
Esta página aún no está traducida y se muestra en inglés.
Drawing rectangles and ellipses
Rectangles and ellipses stay rectangles and ellipses after you draw them: you can change their corners, turn an ellipse into a pie or an arc, and still resize them freely. To edit them node by node, convert them to curves with Object > Convert to Curves.
Drawing with a box
The Rectangle, Ellipse, polygon, star, spiral, graph paper, common shapes and action lines tools all draw by dragging a box. While you drag, the object itself follows the pointer, with the settings of the property bar.
- Hold Ctrl to draw a square, a circle or a regular shape.
- Hold Shift to draw from the center out. You can press or release it while dragging.
- The start and end points snap to what snapping is set to.
The new object takes the default fill and outline (no fill and a thin black outline at first) and is selected. To change those defaults, see Object styles and defaults.
Rectangle
Choose the Rectangle tool (F6) and drag from one corner to the opposite one. Double-click the tool's button to draw a rectangle the size of the page; hold Shift while you double-click to frame the selection instead.
Corners
The property bar sets the corners of the selected rectangles, or of new ones when nothing is selected:
- The corner style: Round (a quarter circle), Scalloped (a quarter circle cut inwards) or Chamfered (a straight cut).
- The four sizes: top left, top right, bottom left and bottom right. The size is the radius, or for a chamfer how far from the corner the cut starts. A corner can take what the corners beside it leave of its two sides: on a 100 x 80 mm rectangle with a 10 mm corner at the top left and square corners at the bottom, the top right corner can be 80 mm. When two corners are too big for the side they share, all the corners are drawn smaller by the same amount and the fields show the sizes drawn.
- Edit corners together (the lock, on at first) gives all four the size you type in one.
- Relative corner scaling (on at first): the corners grow and shrink with the rectangle. Turned off, they keep their size when you resize the rectangle and stay round when you stretch it.
You can also drag a corner node with the Shape tool to round all corners at once.
3-Point Rectangle
The 3-Point Rectangle tool draws a rectangle at an angle:
- Drag to draw the base line, at any angle (hold Ctrl for steps of 15 degrees).
- Move the pointer to set the height and click.
Ellipse
Choose the Ellipse tool (F7) and drag a box. Hold Ctrl for a circle.
On the property bar, choose Ellipse, Pie or Arc. For a pie or an arc, set the start and end angles (in degrees, counterclockwise from the right) and the direction. You can also drag the node of an ellipse with the Shape tool to make a pie (drag inside) or an arc (drag outside).
An arc is an open curve: its fill shows only while Fill open curves is on in the document options. A pie is closed and keeps its fill.
3-Point Ellipse
The 3-Point Ellipse tool draws an ellipse at an angle:
- Drag to draw the center line of the ellipse, at any angle.
- Move the pointer to set the height and click.
For a circle around a point, press on the point and drag out with Ctrl held: the line you drag is the radius, and the circle is drawn when you let go, with no click for the height.
The Corners panel
The Corners panel rounds, scallops or chamfers the corners of curves, which the rectangle settings cannot do. Open it from Window > Panels.
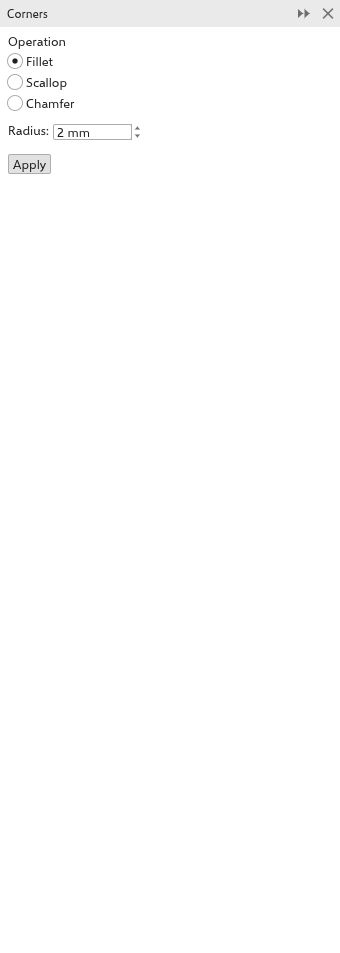
- Select one or more objects. Rectangles, ellipses, polygons and text become curves when the corners are cut.
- Choose the Operation: Fillet (a round arc that touches both sides), Scallop (a notch, a quarter of a circle around the corner) or Chamfer (a straight cut).
- Set the Radius for a fillet or scallop (2 mm at first), or the Chamfer distance for a chamfer: the first distance along the side the path comes in on and the second along the side it leaves on. Equal distances keeps them the same.
- The result shows as a dashed outline on the drawing. Click Apply.
A corner is a node where two segments meet at an angle; smooth nodes are not corners. With the Shape tool and some nodes selected, only those corners are cut. A corner whose sides are too short for the cut is skipped. On a stretched object a fillet or scallop still comes out round, with the radius measured on the page.