
Cette page n'est pas encore traduite et s'affiche en anglais.
Data merge
Data merge fills a design with data, to make many versions of it: name badges, numbered tickets, certificates, labels with QR codes. Each record of your data becomes a copy of the page, filled in.
Setting up a merge
- Design the page. Where a value goes, type the field name in angle brackets in a text object, such as
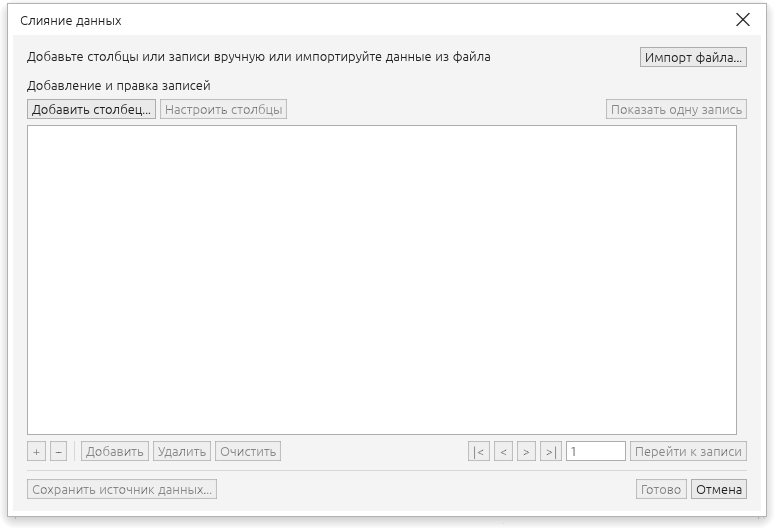
<Name>. - Choose File > Data Merge > Create/Load Data Merge.
- Add the data:
- Import file reads a CSV file (separated by commas, semicolons or tabs, as Excel or any other program saves it) or an Excel workbook (
.xlsx, its first sheet) whose first line names the fields. Fields named like a photo or a picture, or whose cells are picture files, start as pictures, fields named QR as QR codes; the types show at once to be changed; - or Add column to add fields by hand, then add records with +.
- Import file reads a CSV file (separated by commas, semicolons or tabs, as Excel or any other program saves it) or an Excel workbook (
- Click Finish. The Data Merge panel opens, where you put the fields on the page and make the merge.
The Data Merge panel
The Data Merge panel (also under Window > Panels) works with the data source you created or loaded:
- Create and Edit open the records.
- Choose the kind of field, Text, Picture or QR code, and the column under Data source columns.
- For a picture, Pictures folder chooses the folder your photos are in, when the data names only their files (a name without an extension, such as
1024, finds1024.jpgor1024.png). Placeholder image chooses a picture that stands in for the merged ones while you design, and Align and scale sets where each picture goes in its frame: click one of the nine points to anchor it, then choose Actual size, Fit proportionally, Fill proportionally (the frame cuts what is outside) or Stretch to fill. - Insert Field puts the field in the text you are editing, or places a new text, picture frame or sample QR code in the middle of the view. Move and size it like any object. Paint the sample QR code with any colour and put it inside a shape with Place Inside Frame: every record's code comes out in that colour, inside that shape. A barcode keeps the colours given to its bars, background and digits in the same way.
- To put each photo inside a shape of your own (a circle, an oval, any outline, also inside a grouped card design), choose Image and the photo column, select the shape and click Place Inside Frame. Every card's photo then goes inside that shape, placed by the alignment and scale.
- Tick On every page (off at first) before Insert Field to put a text, picture or QR code field in the same place on every page of the drawing. Create Merged Document then fills the drawing's own pages, one record each, instead of making a new drawing. Move or resize the field on its page and the copies on the other pages follow it when you merge; a copy you moved by hand on its own page stays where you put it.
- Select a field and click Update Field to change its column or its alignment and scale.
- Create Merged Document makes the merged pages in a new drawing: the page you are on is copied once per record and each copy is filled in. Your design stays as it is. Print Merged Document does the same and opens Print.
Perform Merge instead adds the filled copies to the current drawing, right after the page, named after the page and the record number.
Kinds of field
- Text: replaces
<Field>in every text of the page. - Number: a counter you do not type: a start, a step and a number of digits (start 7, step 3, digits 3 gives 007, 010, 013). Its Format is 1, 2, 3 (the default), A, B, C or a, b, c (1 is A, 26 is Z, then AA), or Custom, which puts a text of your own before and after the number, for tickets and serial numbers ("Ticket T-" before, 4 digits and start 98 give Ticket T-0098, Ticket T-0099 and so on). When you add a Number column, untick Continually increment value to give every record the same number, or give an ending value to make the records from the start to the end at once (15 to 25 in three digits makes eleven records, 015 to 025), with no data file at all.
- Random number: a random whole number for each record, drawn From one number To another, padded with zeros to its Digits and written after the Text before you give (raffle tickets, codes). With No repeats (on at first) no number comes twice; when the range holds fewer numbers than there are records, the dialog says so and the merge is not made, so widen the range or allow repeats. Records makes that many records when there are fewer, so random numbers need no data file. The numbers stay the same, in the grid, the merged pages and the print, until you click Draw Again in Configure columns.
- Picture: the cell holds the path of a picture. A text holding only
<Field>becomes the picture, as large as fits its box. Put that text inside a frame with Place Inside Frame (a photo frame) and the picture fills the frame, cut by it. A rectangle, ellipse or curve named<Field>(in the Objects panel) takes the picture inside it the same way.
Fields work in groups and frames too, so a card can be grouped.
- QR code: a text holding only
<Field>becomes a QR code of the cell's text. - Barcode: choose Barcode in the panel and click Insert Field. The Barcode Wizard opens with the field as its data; choose the standard, sizes and text as for any barcode and click Finish. Each record's page gets its own barcode made from its value, in the place and size of the one you placed. With On every page ticked the barcode goes on every page. The data can mix fixed text and fields: with a Number field
Serialof six digits starting at 15, the data590123<Serial>gives the EAN-13 barcodes 590123000015, 590123000016 and so on, only the last digits changing. A record whose value the standard cannot hold gets no barcode.
An empty cell, or a picture that does not load, removes that object from the record's page.
Editing the records
Configure columns renames fields, changes their type and counter settings, and removes fields. View single record shows one record as a form; use the arrows or Go to record to move through them. The placeholder buttons insert a field into the text you are editing. Save data source writes the records as a CSV file.
To work on several cells at once, drag from one cell to another, or over the record numbers or the field names to take whole records or fields. Then Add adds as many empty records after them, Delete removes their records and Clear (or the Delete key) empties the cells.
Edit Data Merge reopens the records.