
Cette page n'est pas encore traduite et s'affiche en anglais.
Bitmap effects
Bitmap effects change pixels: blur, sharpen, adjust colors, add textures and artistic strokes. They work on bitmaps and also on vector objects, which are then drawn as the picture the effects make while keeping their own shape, fill and outline.
Effects are kept apart from the original pixels: you can edit, hide, reorder or remove any of them later, and removing the last one gives the original back.
To apply a bitmap effect
- Select one or more objects.
- Choose a group in the Effects menu and an effect.
- Effects without settings apply at once. The others open a dialog box you can size, with the first selected object before and after in the Before and After preview and the settings on the right. The effect also shows on the drawing and follows every value as it changes (untick Preview to switch that off); the work is done in the background, so the window keeps answering on large pictures. Click OK to keep what the drawing shows as one undo step; Cancel or Esc put the drawing back exactly as it was. The settings sit in a panel at the right; under it Reset puts every setting back to its default, and the two arrows undo and redo the changes made in the dialog box.
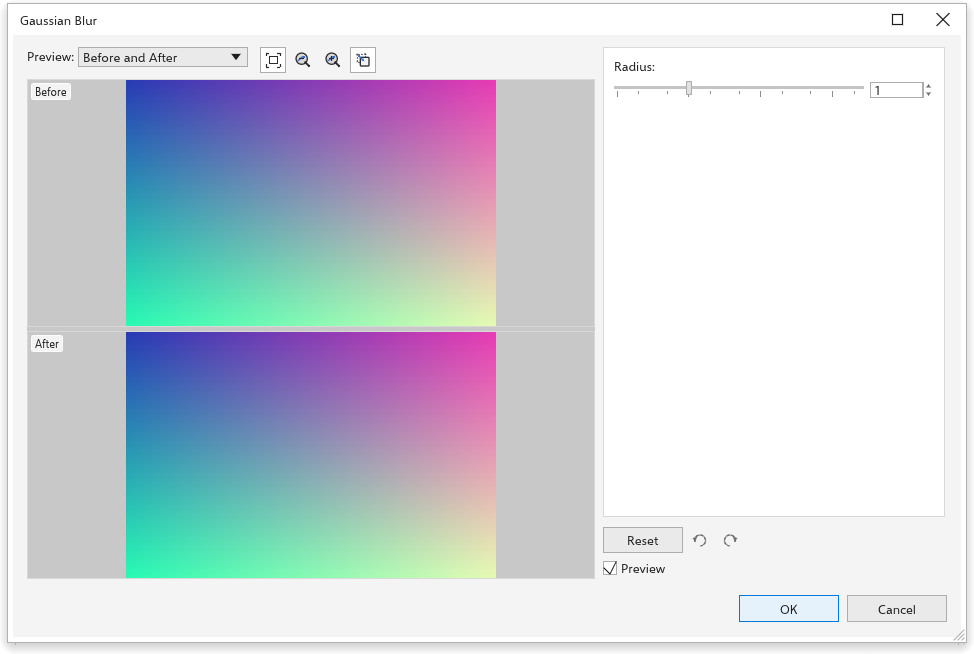
The change to the whole selection is one undo step. With a bitmap selected, Ctrl+B opens Brightness/Contrast/Intensity, Ctrl+Shift+B Color Balance and Ctrl+Shift+U Hue/Saturation/Lightness.
The effect groups
| Group | Effects |
|---|---|
| 3D Effects | Cylinder, Emboss, Page Curl, Pinch/Punch, Sphere |
| Adjust | Auto Adjust, Image Adjustments, Contrast Enhancement, Local Equalization, Target Color Balance, Tone Curve, Brightness/Contrast/Intensity, Color Balance, Gamma, Hue/Saturation/Lightness, Selective Color, Replace Colors, Desaturate, Channel Mixer |
| Art Strokes | Charcoal, Conté Crayon, Crayon, Cubist, Impressionist, Palette Knife, Pastels, Pen & Ink, Pointillist, Scraperboard, Sketch Pad, Watercolor, Felt Marker, Paper Grain |
| Blur | Directional Smooth, Gaussian Blur, Smooth Jagged Edges, Low Pass, Motion Blur, Radial Blur, Smart Blur, Smooth, Soften, Zoom |
| Camera | Colorize, Diffuse, Photo Filter, Sepia Toning, Vintage Photo |
| Color Transform | Bit Planes, Halftone, Psychedelic, Solarize |
| Contour | Edge Detect, Find Edges, Trace Contour |
| Correction | Dust and Scratch |
| Creative | Crystallize, Fabric, Frame, Glass Tiles, Mosaic, Scatter, Tinted Glass, Stained Glass, Vignette, Vortex |
| Custom | Bump Map |
| Distort | Blocks, Displace, Mesh Warp, Offset, Pixelate, Ripple, Swirl, Tile, Wet Paint, Whirlpool, Wind |
| Noise | Add Noise, Maximum, Median, Minimum, Remove Moiré, Remove Noise |
| Sharpen | Adaptive Unsharp, Directional Sharpen, High Pass, Sharpen, Unsharp Mask |
| Texture | Cobblestone, Wrinkles, Etching, Plastic, Relief Sculpture, Stone |
| Transform | Deinterlace, Invert Colors, Posterize |
Special dialogs
- Image Adjustments opens a larger dialog box: a large preview you can zoom, pan and rotate, shown alone, side by side or split; Auto adjust and pickers for the white and black points; sliders for temperature, tint, saturation, brightness, contrast, highlights, shadows and midtones, with a histogram; undo and redo inside the dialog; and snapshots of settings to compare.
- Contrast Enhancement shows the histogram with markers to drag for the input and output levels, eyedroppers for black and white, and Auto adjust.
- Tone Curve edits a curve per channel (master, red, green, blue) in four styles (curve, straight, freehand, gamma), over the histogram; curves can be saved and loaded.
- Colors of the picture, such as in Replace Colors, have an eyedropper: click a preview to take the color under the pointer.
Editing the effects of an object
The FX section of the Properties panel lists the effects of the selected object, first applied at the top. Each row has a check box to show or hide the effect, Edit (opens its dialog box), Move up, Move down and Delete. Add effect opens the effect groups.
Effects > Flatten Effects makes the effects permanent: a bitmap keeps what it shows, and a vector object becomes a bitmap.
On all pages
In a drawing of several pages, the dialog box of an effect shows an All pages box while a picture is selected. With it ticked, OK gives the effect to every picture on every page as well, in one undo step. Locked pictures, and pictures on locked layers, stay as they are.
Effects > Apply to Pictures on All Pages does the same with the effects the selected picture already has, effects without a dialog box included: every other picture takes the same list of effects, in one undo step.
The Effect Picker
Effects > Effect Picker opens a window that stays open while you work, with every effect as a small picture. Type in the search field to find effects, or choose a group or Recent from the list. With something selected, click a tile to apply the effect. You can also apply an effect as a lens.
Effects that spread past the edges
Blurs and similar effects can reach past the edges of a bitmap. With Image > Bitmap Padding > Automatic on (as at first), the bitmap grows to make room for them. See Resampling and straightening.
To save a bitmap with its effects as a PNG file, right-click it and choose Save Bitmap As.