
এই পৃষ্ঠাটি এখনও অনূদিত হয়নি এবং ইংরেজিতে দেখানো হচ্ছে।
Shaping curves with the Shape tool
The Shape tool (F10) edits the nodes and segments of a curve: you move nodes, bend segments, add and delete nodes and change how each node joins its segments.
Nodes and segments
Select a curve with the Shape tool. Its outline shows in the node color, its nodes as small markers, and the first node of each part of the curve as a slightly larger triangle. A selected node shows its control handles: dashed lines that end in an arrow at the control point.
A node is one of three types:
- Cusp: the segments meet at an angle; each handle moves on its own.
- Smooth: the curve passes through without a corner; the two handles stay in line.
- Symmetrical: smooth, with both handles the same length.
The pointer shows what a press would take: a small square over a node, a dot over a control handle, a wave over a segment.
Selecting nodes
- Click a node to select it alone; Ctrl+click adds it or takes it out of the selection.
- Shift+click selects every node from the last selected one to the one you click.
- Drag a marquee around nodes. The property bar's selection mode chooses a rectangular or a freehand marquee; Alt+drag always draws a freehand one, and Alt+Shift+drag adds its nodes to those selected.
- Tab and Shift+Tab select the next or previous node; Home and End the first or last.
- Ctrl+A, the select all nodes button, or a double-click on the tool's button selects every node.
Moving nodes and bending segments
- Drag a node to move the selected nodes. Hold Ctrl to move only horizontally or vertically. Nodes snap like drawing points, also to the other nodes and segments of their own curve.
- Drag a segment to bend it: the point you grab follows the pointer while the nodes at its ends stay. A straight segment becomes curved. Cusp nodes at its ends stay cusp, and their other handles stay where they are.
- Drag a control handle to change the bend.
- While you drag a node, a segment or a handle, the page keeps the picture it had before the drag and the curve follows the pointer as the thin line the tool draws over it. The outline, with its width nodes, brush, arrowheads and effects, is drawn again once, when you release the button.
- The arrow keys nudge the selected nodes (Shift for a larger step, Ctrl for a smaller one).
- Click a control handle to choose it (a ring shows round its head): the arrow keys then move that handle instead of the nodes. Click anywhere else to let go of it.
- Double-click a segment to add a node there, a node to delete it. Click a segment to mark a spot, then press + to add a node there.
- Delete or - deletes the selected nodes; + adds a node in the middle of each segment that ends at them. Neighbouring nodes deleted together leave one curve fitted to the old outline, so the shape keeps its general form.
- With nodes selected, C makes them cusp, S smooth and Y symmetrical.
- With nodes selected, Ctrl+C copies the segments between them as new curves, Ctrl+X cuts them out, and Ctrl+D duplicates them.
Right-click a node or segment for a menu of the commands below.
With several objects selected, the object picked last shows its outline in the node color (blue) and the others in the secondary node color (red), also while a node is dragged, so you can tell them apart. End nodes of two different objects are not joined, by Join nodes or by dropping one on the other: combine the objects first (Object > Combine, Ctrl+L), then join their ends.
Rounding corners of curves
Rings inside the corners of a curve let you round a corner by dragging. They are off at first, so they do not get in the way of editing nodes; turn on Show corner rounding rings on curve nodes (Shape tool) on the Nodes and Handles page of Tools > Options > TraceDraw to use them.
- Drag the ring of a corner between two straight sides to round it. A rounded corner keeps its ring: drag it again to change the radius, further in or back to a sharp corner. This also works on corners rounded in saved drawings and with the Corners panel.
- With the rings on, the property bar shows the radius of the chosen corners (click a ring to choose it), or of every corner when none is chosen; type a radius to round them. The three buttons before it make the value round the corners, scallop them (a notch curving inward) or chamfer them (a straight cut), the value then being the distance along each side.
- On a stretched curve the corners come out round on the page, not oval. Rectangles round their corners by their own nodes, whatever this option says.
The property bar
- Selection mode: rectangular or freehand marquee.
- Add node and Delete node. Add node puts a node in the middle of each segment ending at a selected node and keeps the nodes selected with the new ones, so pressing it again doubles the nodes again.
- Join nodes joins two end nodes into one; Break curve splits the curve at the selected node.
- Convert to line and Convert to curve make the segment ending at the node straight or curved.
- Cusp, Smooth and Symmetrical set the node type.
- Reverse direction turns the curve round; Extend curve to close joins two selected end nodes with a straight segment; Extract subpath makes the part of the selected node a curve of its own; Close curve closes an open curve.
- Stretch and scale nodes and Rotate and skew nodes frame two or more selected nodes with handles: the corner handles scale (or rotate), the side handles stretch (or skew) only those nodes.
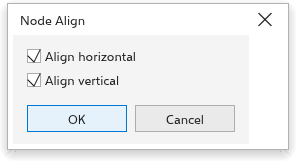
- Align nodes opens the Node Align dialog box (see below).
- Reflect horizontally and Reflect vertically: moving a node moves the selected nodes on the other side the mirrored way, so both sides of a shape change together.
- Elastic mode: the selected nodes move less the further they are from the one you drag, down to half as much for the furthest.
- Select all nodes.
- Reduce nodes removes nodes that are not needed, from the selected nodes or from the whole curve. Drag the curve smoothness slider to remove more nodes gradually, or type a value into it; it keeps its value until you do something else, and works from the curve as it was when you first moved it.
Aligning nodes
To line up nodes:
- Select two or more nodes with the Shape tool.
- Click Align nodes on the property bar.
- In the Node Align dialog box, tick Align horizontal, Align vertical or both, and click OK.
The selected nodes move onto a common horizontal or vertical line, or onto one point when both are ticked.
The align keys work on the selected nodes too, two or more: L and R line them up with the leftmost or rightmost node, T and B with the top or bottom node, and E puts them on the middle of their height. Their control handles move with them. (C keeps making a node cusp here.)
Rectangles, ellipses, polygons and other objects
- Drag a corner node of a rectangle to round every corner; Ctrl+drag (or click it first) to round that corner only.
- Drag the node of an ellipse inside it to make a pie, outside it to make an arc.
- Drag a node of a polygon or star: the matching nodes follow, so the shape stays symmetric. Dragging the points between the corners sharpens or twists a star.
- Double-click a rectangle, ellipse or polygon to turn it into a curve.
- Drag a corner of a picture to crop it: the picture goes into a frame whose nodes you can edit like a curve.
- With text, the Shape tool moves single characters; see Adding and editing text.
The appearance of nodes and handles is set on the Nodes and Handles page of the options; see TraceDraw options.